Designing and Building a Custom Gamepad From Scratch
How I learned to design and build my very own custom arcade-style gamepad in just under a month, complete with custom hardware, software, and PCBs.

If you've been following my posts recently, you're probably aware that I have been diving head first into hardware over the past couple months, from modding existing commercial hardware to creating things entirely of my own. It's been very fun, and I've learned a lot so far: embedded software design, how to solder actually-well, enclosure design, and of course how this all fits in to my existing skill set.
But there is, of course, always something new to learn. And there's a big component I've been missing from my skill set that would be invaluable for future projects: PCB design! Proto board is great and all, but after prototyping the design and validating that it works, I might want to clean it up and make it more permanent — so designing a custom PCB would be ideal in this scenario.
I decided to incorporate everything I've learned thus far into this project, and include PCB design as an addition. I settled on a gamepad designed to play Tetris with, since then I would actually get some utility out of it once completed, plus it would look cool on a shelf.
Getting Started
I actually started on this project a few months ago, working on a basic proof-of-concept to make sure I could actually complete this. I had a few goals in mind:
- It would use arcade buttons that light up
- There should be a button for each of the normal Tetris gameplay actions, plus an extra for Zone (a fancy feature from Tetris Effect)
- It should be Bluetooth and able to report itself as a gamepad or keyboard
- It should support the Nintendo Switch by emulating a Pro Controller
- The firmware should be optimized for low latency, and very customizable (e.g. change button mappings, etc.)
- It's gonna be open source
I had a HUZZAH32 (Adafruit's ESP32 dev board) lying around, so I decided to use this as the base for my prototype. I bought some arcade buttons in various colors and wired them up to a breadboard with the HUZZAH32. I found a library that was able to use the ESP32 as a BLE gamepad or keyboard, and I wrote a proof-of-concept firmware to test out some simple actions, and it worked flawlessly! This was definitely going to be possible.
Firmware
Up until this point, I had only really been using either ESPHome or Tasmota to flash my Espressif-based devices, and haven't written my own firmware. Since it was very popular and seemed easy to use, I decided to go with PlatformIO. It handled all the SDK installs, dependencies, and other stuff that would usually be a pain otherwise.
With that being done, I started with a basic version of the firmware which only reported itself as a keyboard and decided that was good enough for the proof of concept. Later on, of course, as the project grew more complex, I abstracted the different modes into a structure which could be easily modified later, and could easily be switched between by holding a certain button down during startup. In total, there are three different modes the gamepad can operate in:
- BLE Gamepad
- BLE Keyboard
- Switch Pro Controller Emulation
The first 2 are pretty self-explanatory and were relatively easy to implement, but the Pro Controller emulation mode was a real pain in the ass. I had to scour the internet in hopes of finding someone who has either done this before or has packaged it into a nice library I could use — ideally, both!
But to no avail. I eventually came across the BlueCubeMod project, which turns a GameCube controller into a wireless Switch controller by emulating a Pro Controller; exactly what I needed! Unfortunately the project's code was... less than ideal, and it took me nearly a day to decipher what I needed from it and port that over to my own project. I ended up with a very hacky sort-of-portable implementation of the Pro Controller protocol. I intend on cleaning this up and turning it into a standalone library so others don't have to go through the pain and suffering I went through to get this working.
After about a week I was satisfied with the firmware and decided to leave it as it is; it included a configurable button map for each of the modes, so you could recompile it yourself in order to suit your play style or different Tetris games (if they divert from Guideline, for some reason).
Enclosure
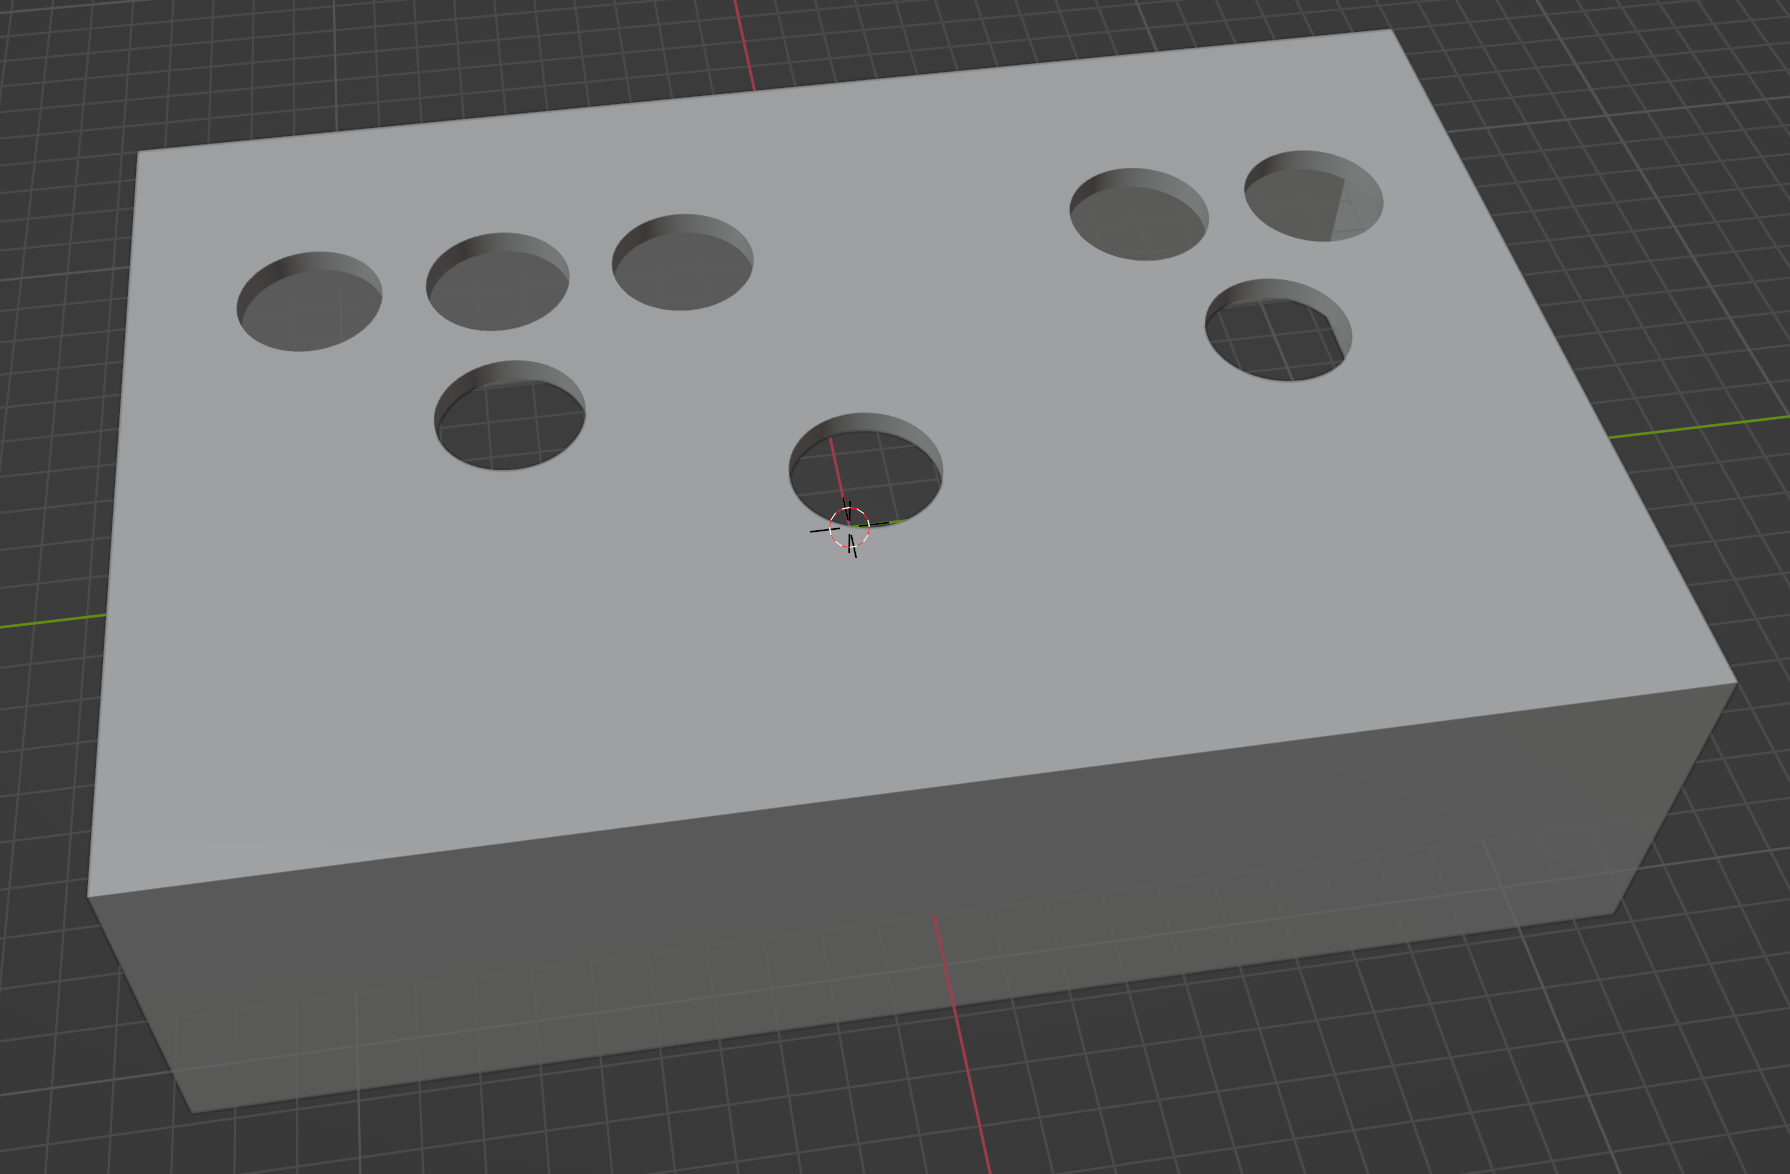
The enclosure was actually one of the first things I mocked up, shortly after the proof of concept. I originally designed it in Blender; here's what that looked like:
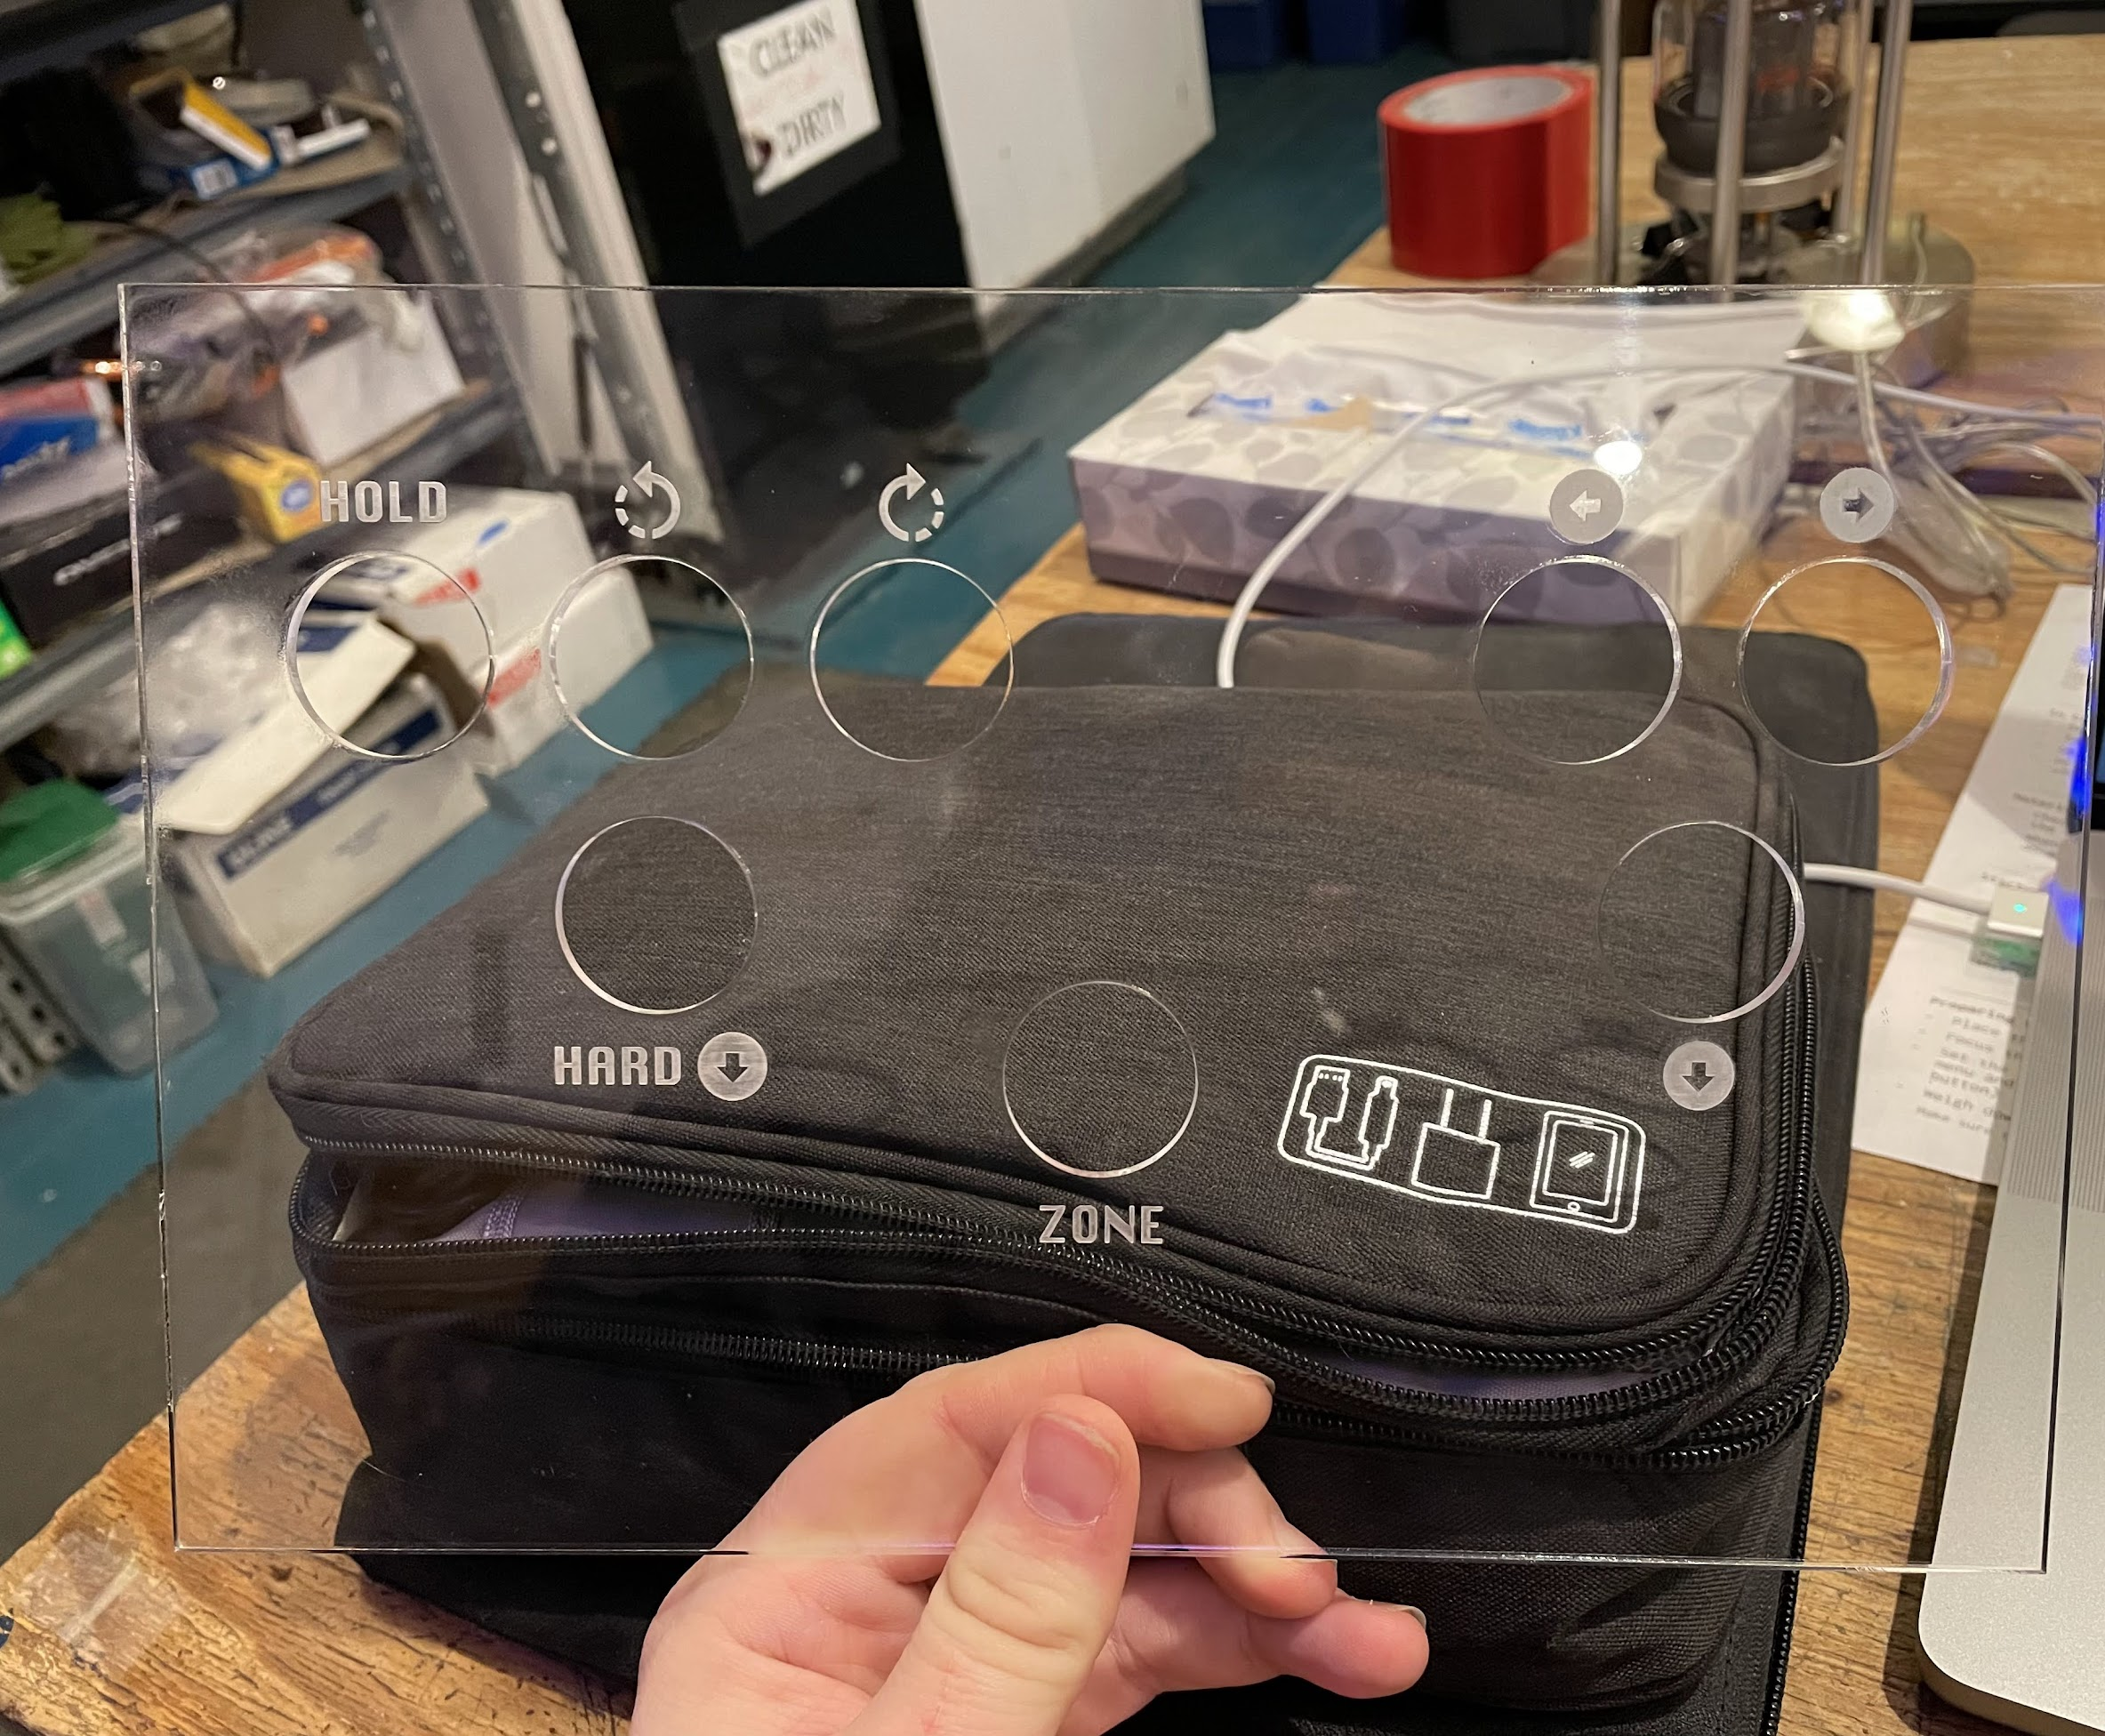
And I was originally thinking of 3D printing it, but realized after visiting NYC Resistor that a laser cutter would probably do a better job. So after attending their laser cutting class, I ported what I had in Blender to something laser-cuttable (SVG files), and came up with this:
I had to go through several revisions and try different methods of adhering the sides to each other before I found something that worked. Here was the first kinda-working prototype:
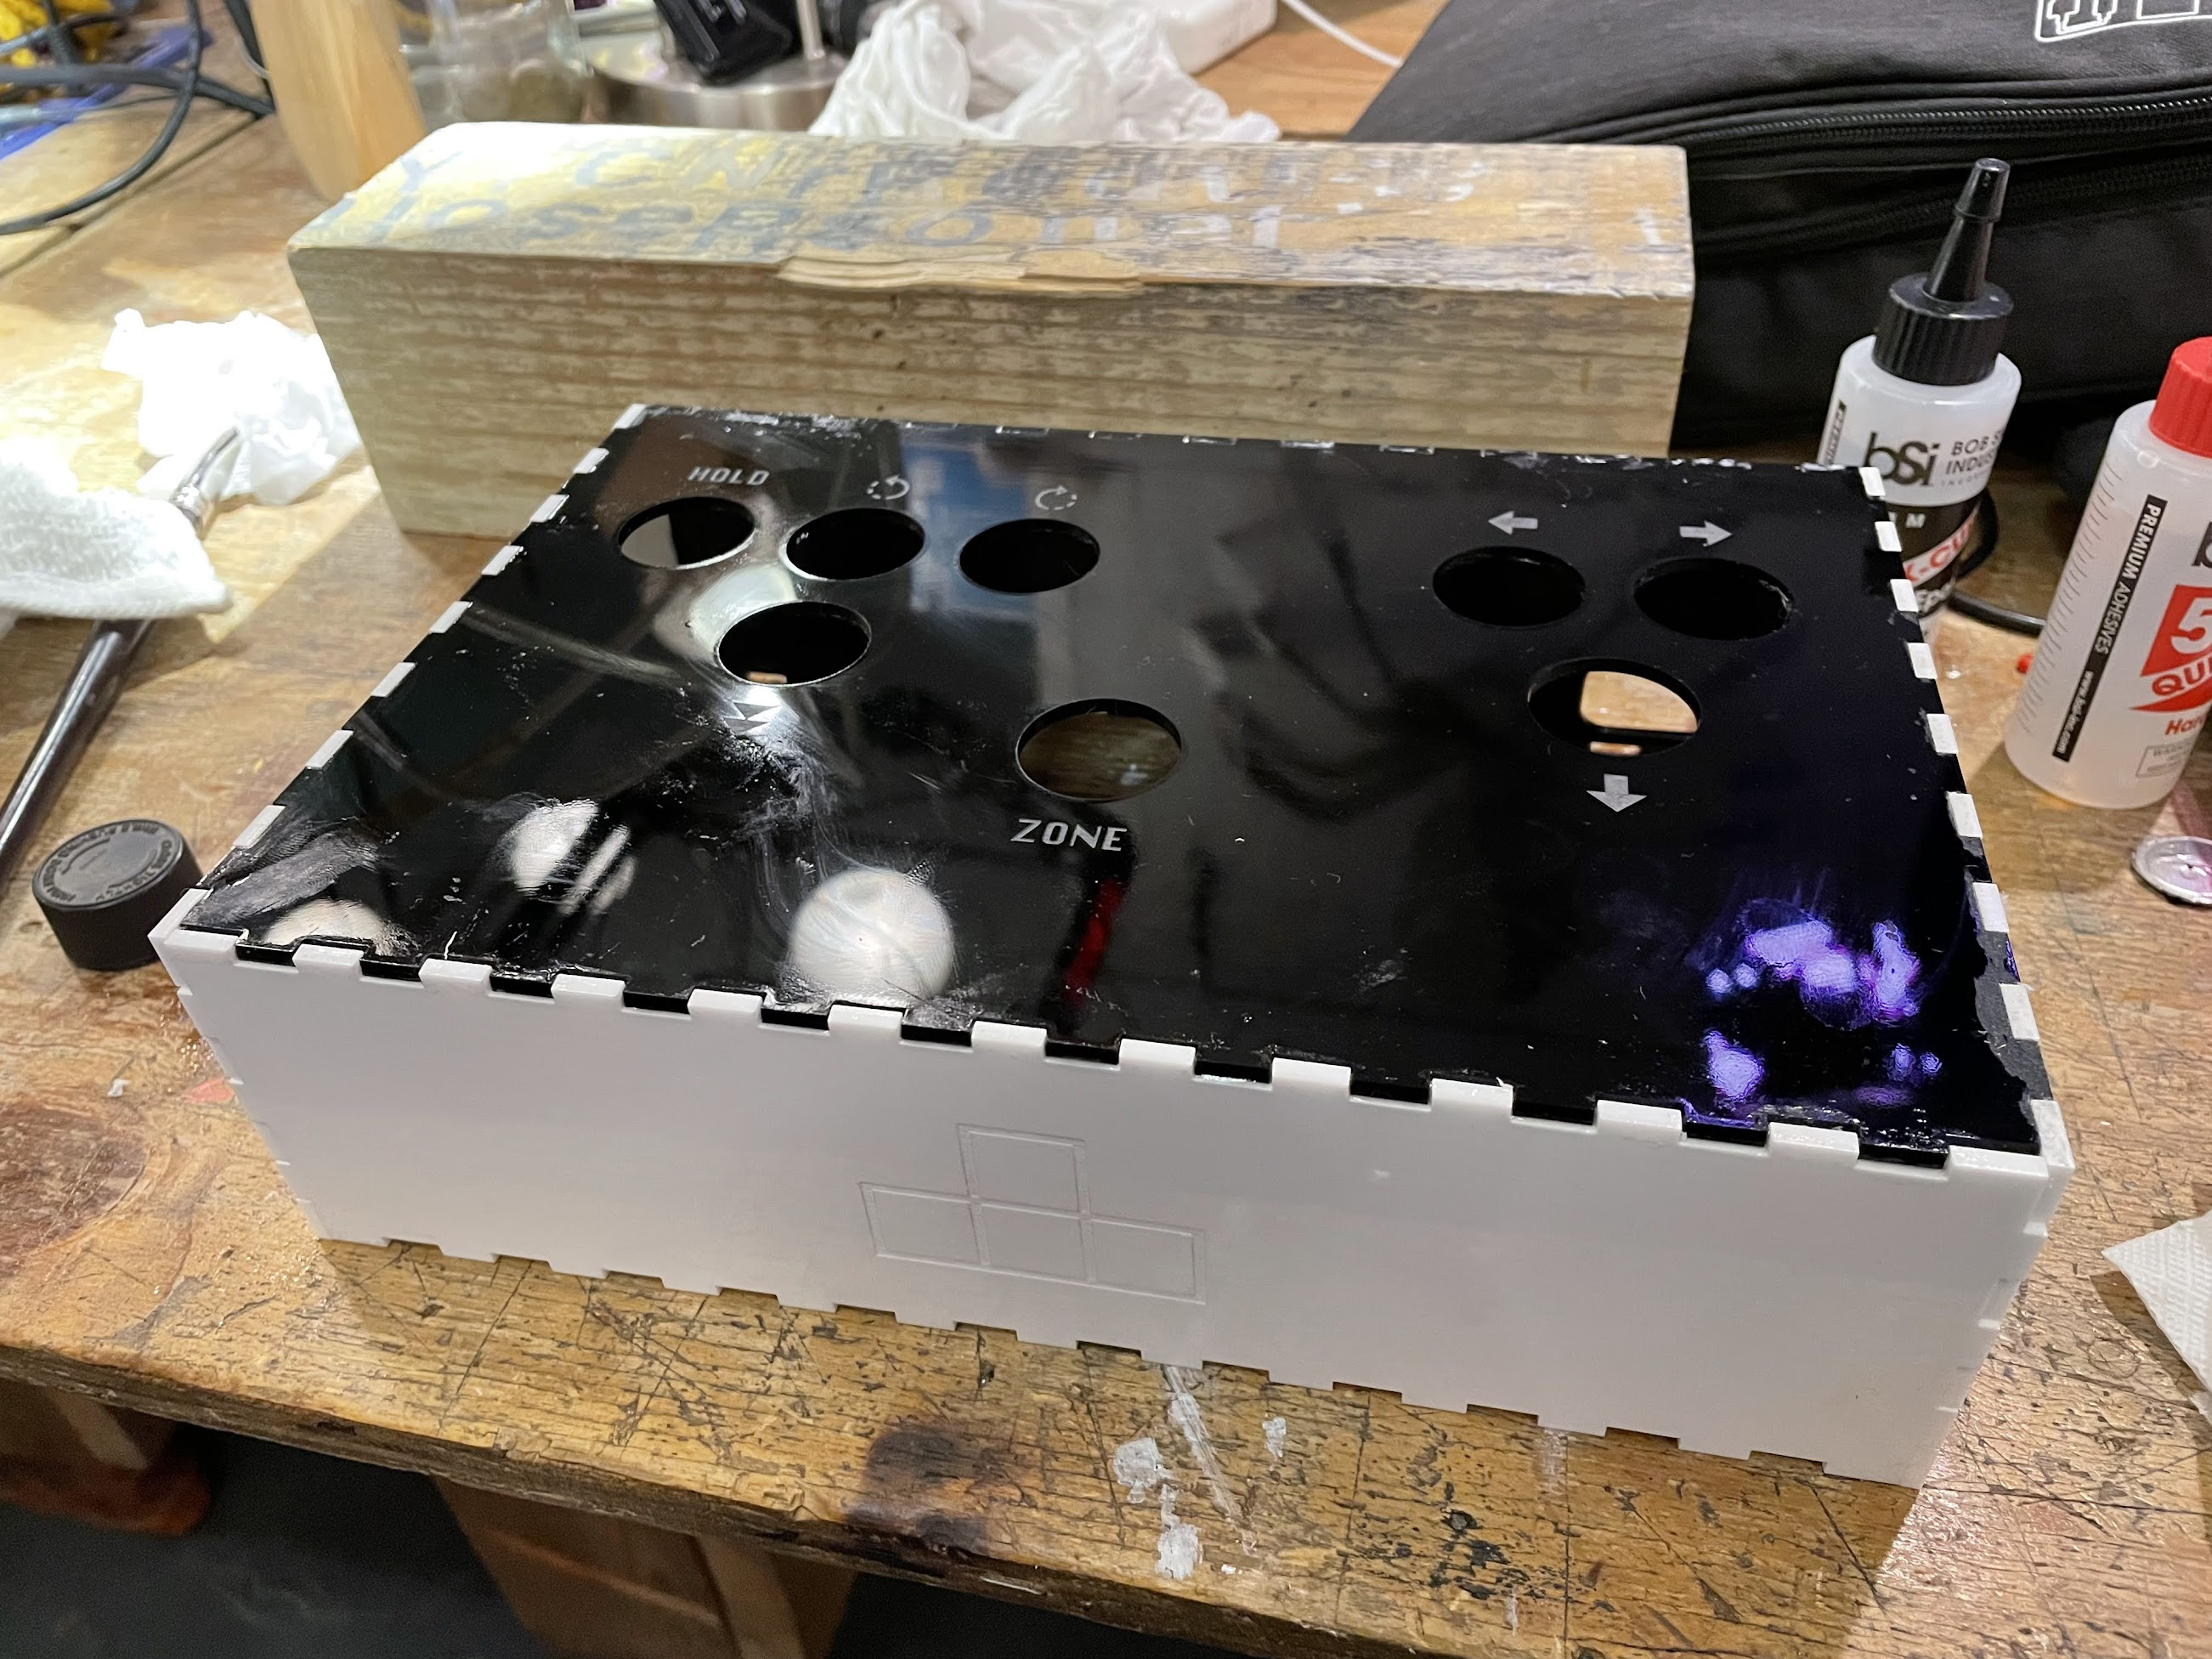
I wasn't satisfied with the adhesive I used in this iteration, so I cut another prototype and...

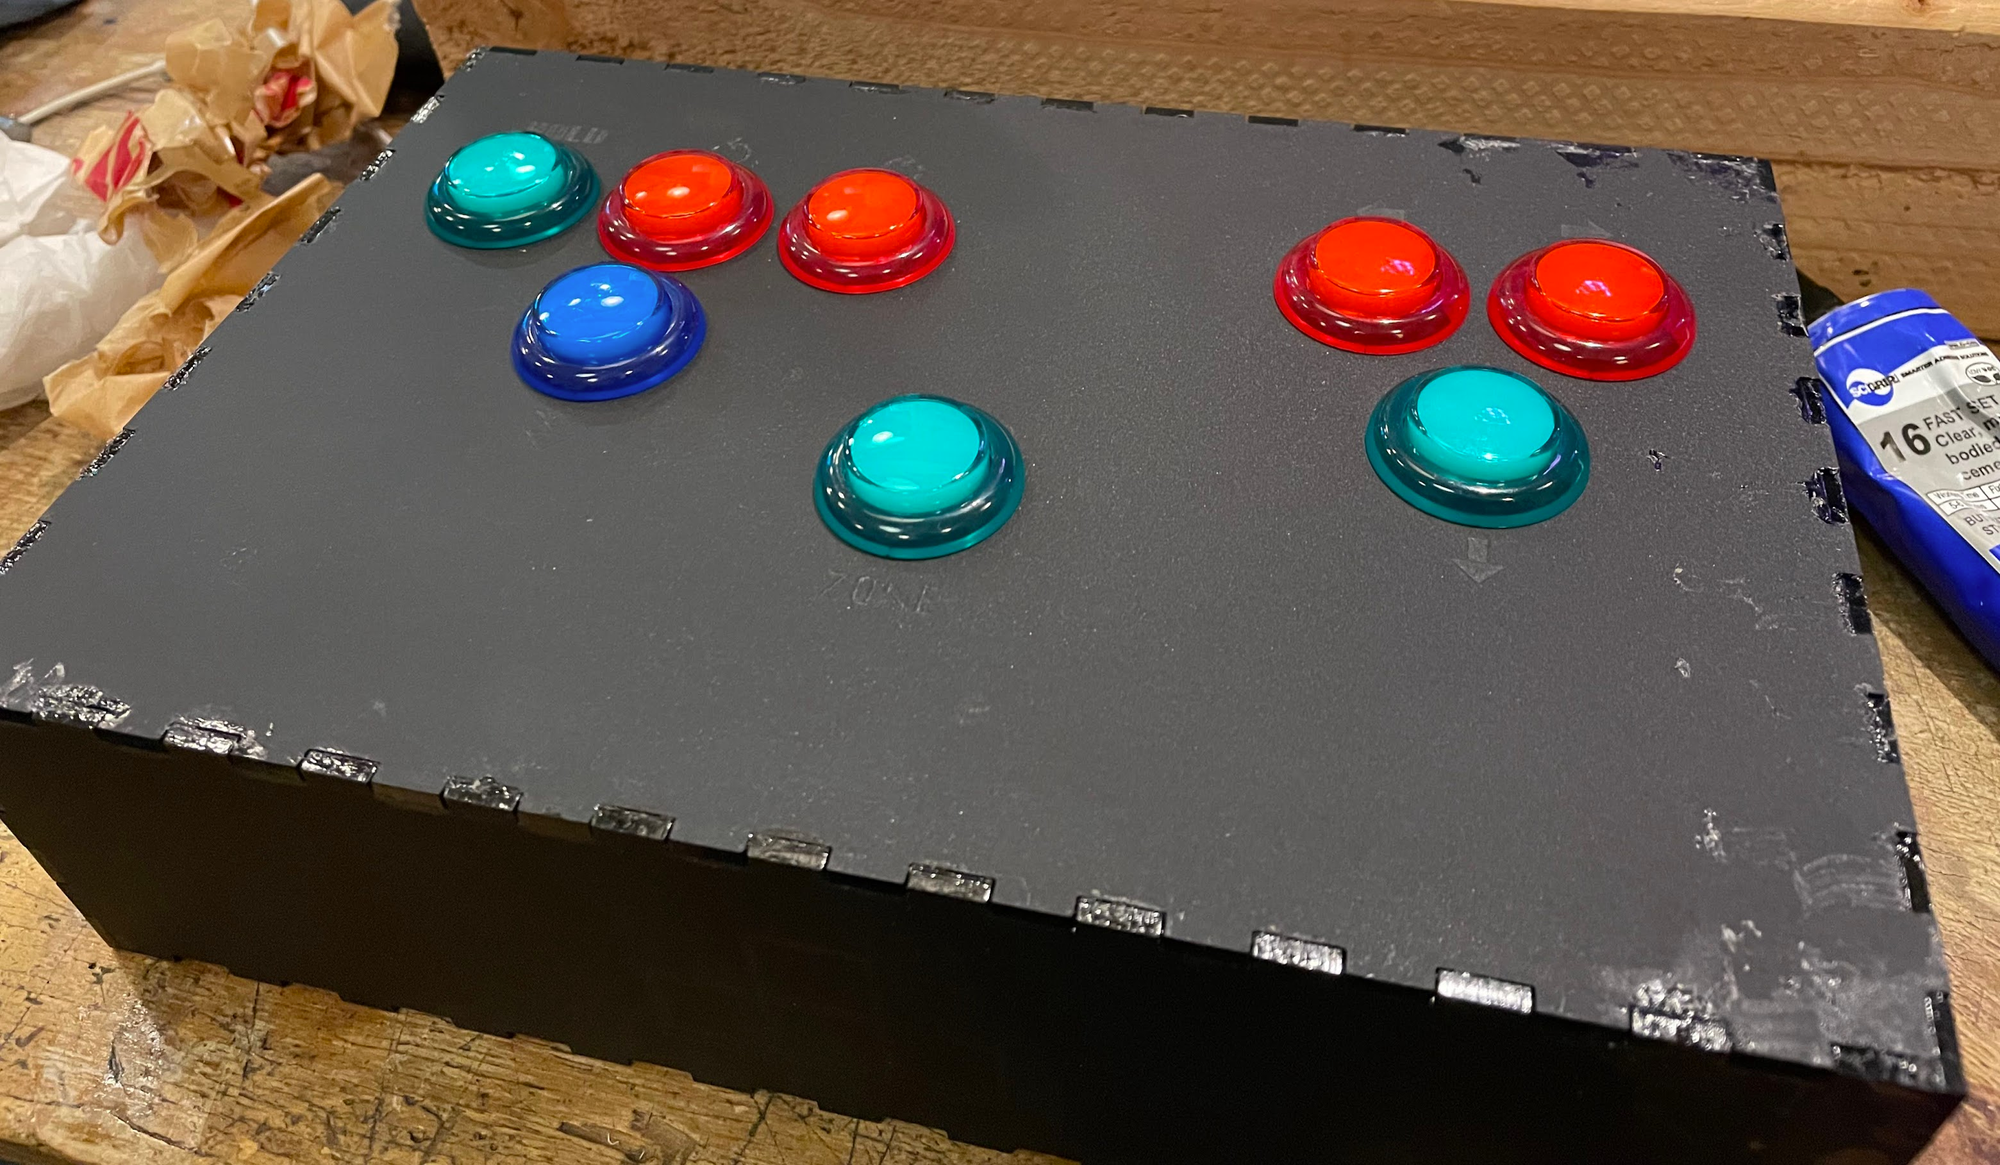
Beautiful! Unfortunately the labels didn't show up very well on this matte acrylic but it was functionally better than my previous iterations. And at this point I was tired of laser cutting, lol. So this is what I ended up with.
The PCB
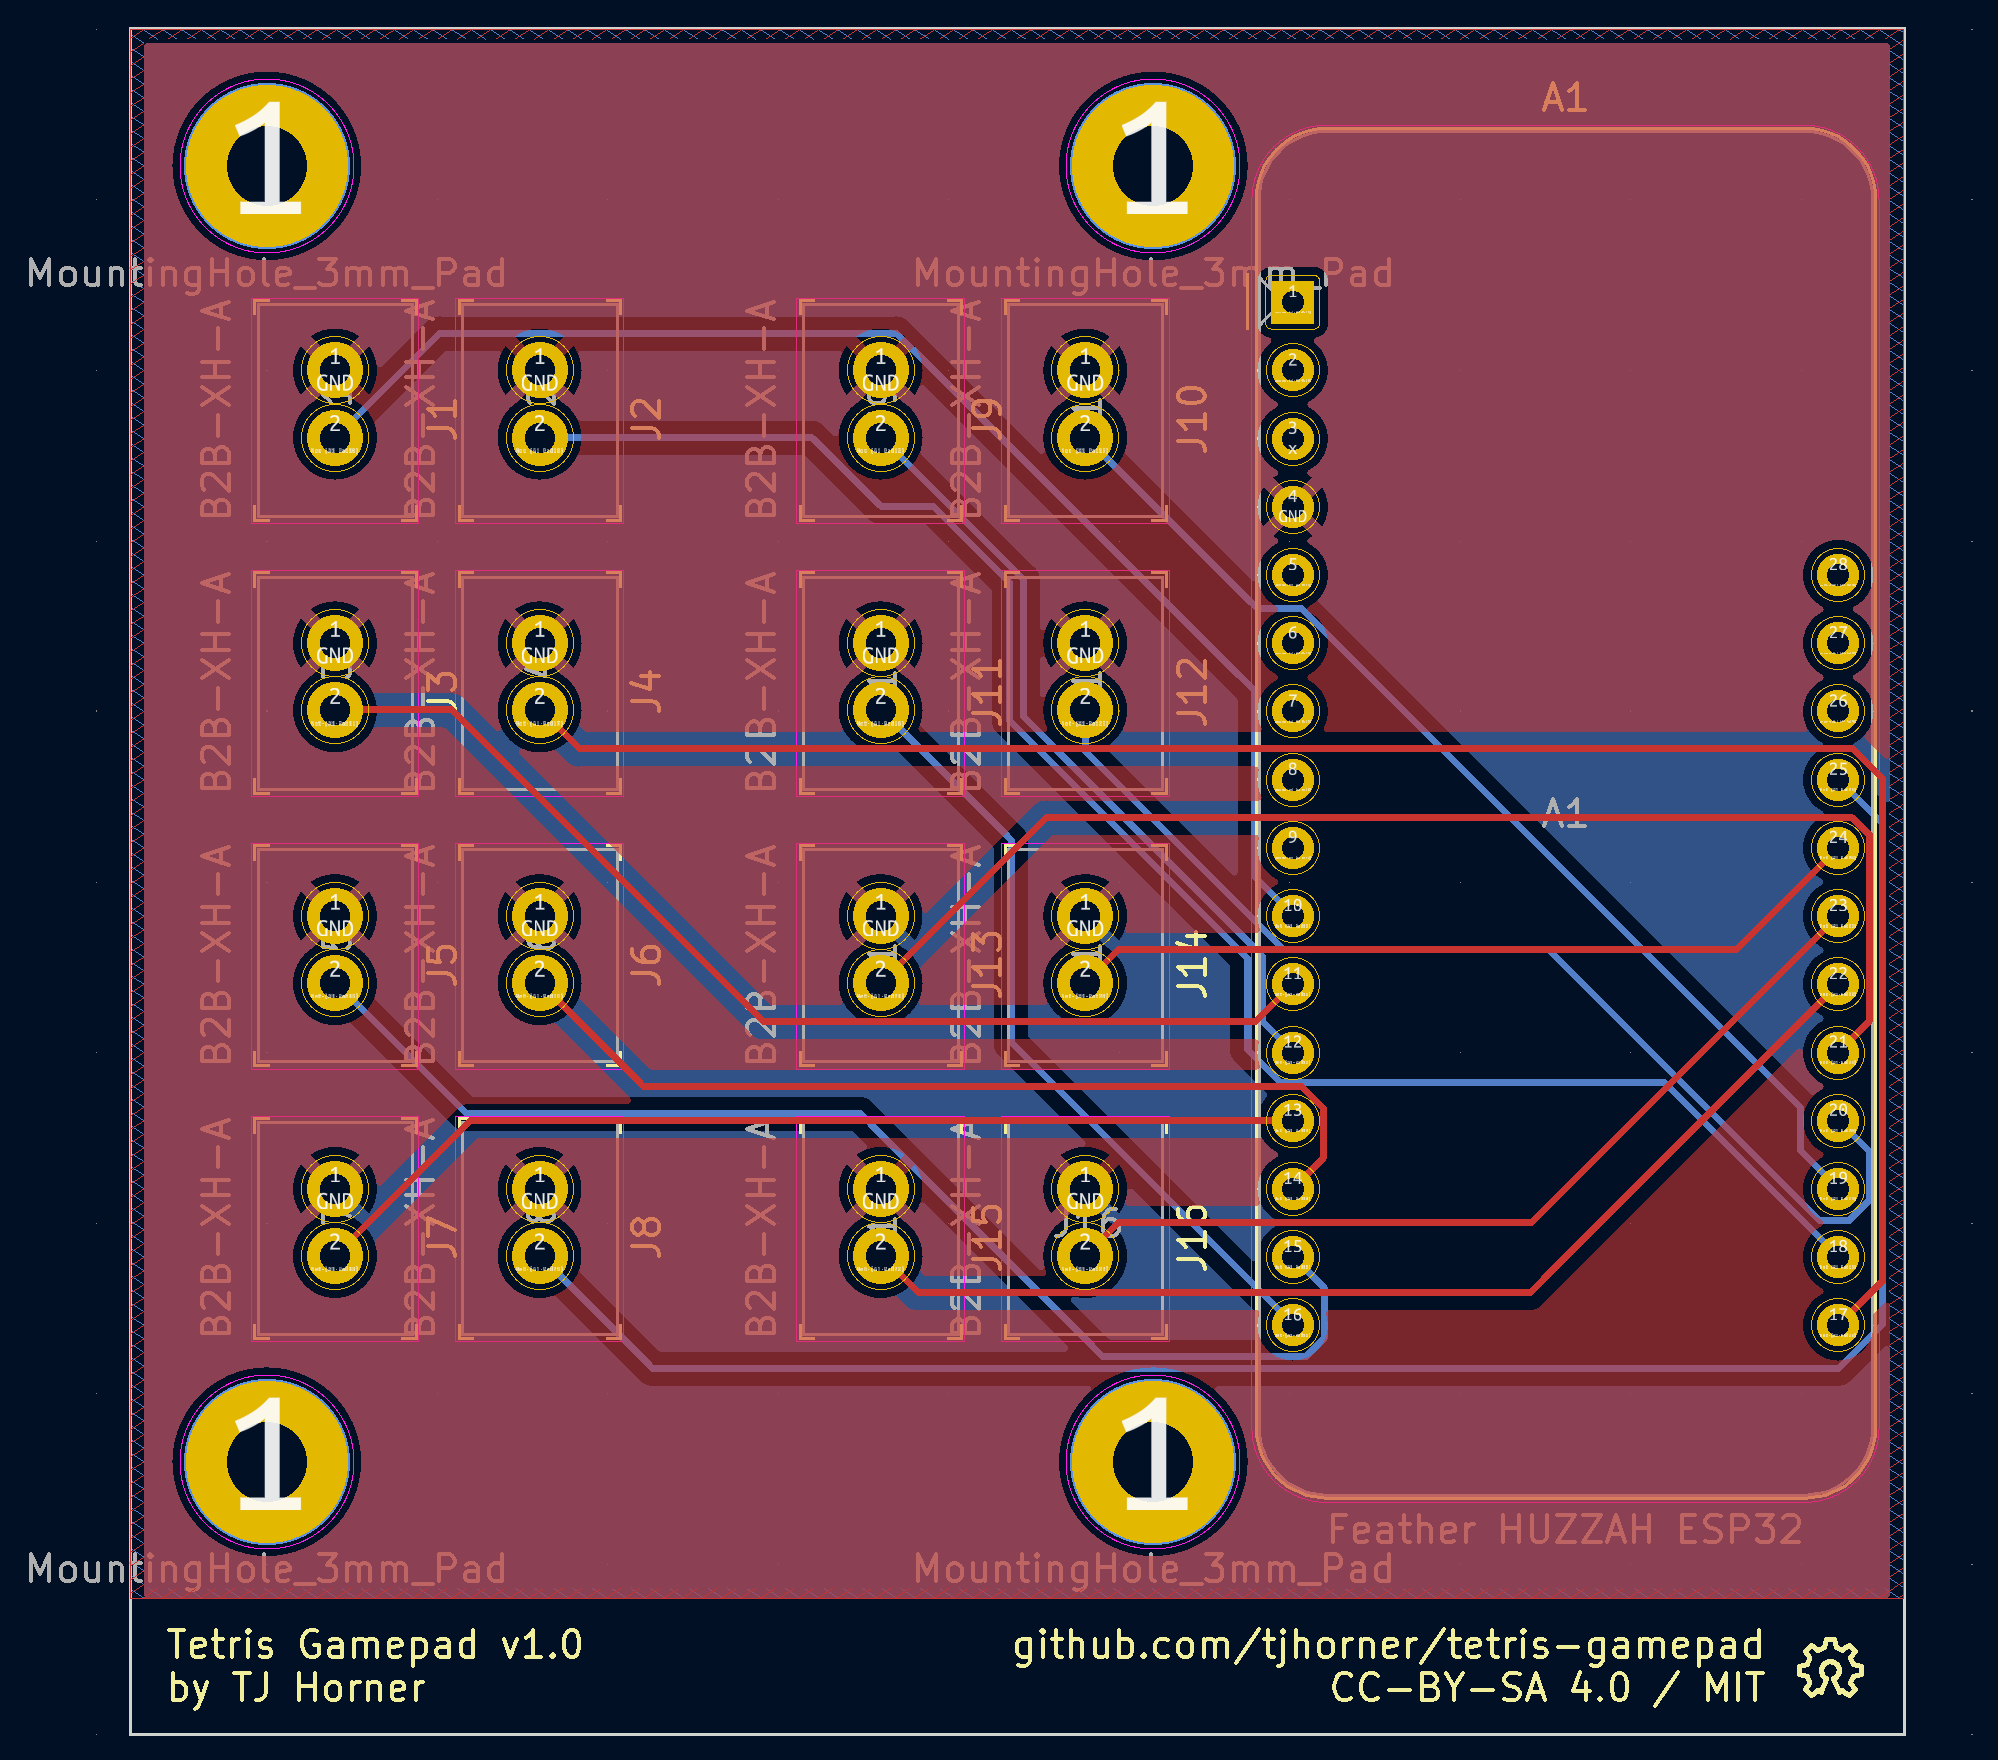
Since there were a lot of connections to be made (16 in total) I decided that a proto board wouldn't cut it this time, and I wanted to design a custom PCB for this and get it fabricated. I've never done this before, so I followed some KiCad tutorials online to get started, and within a few hours or so I had a PCB connecting the JST connectors from the arcade buttons to the pins I needed on the HUZZAH32.
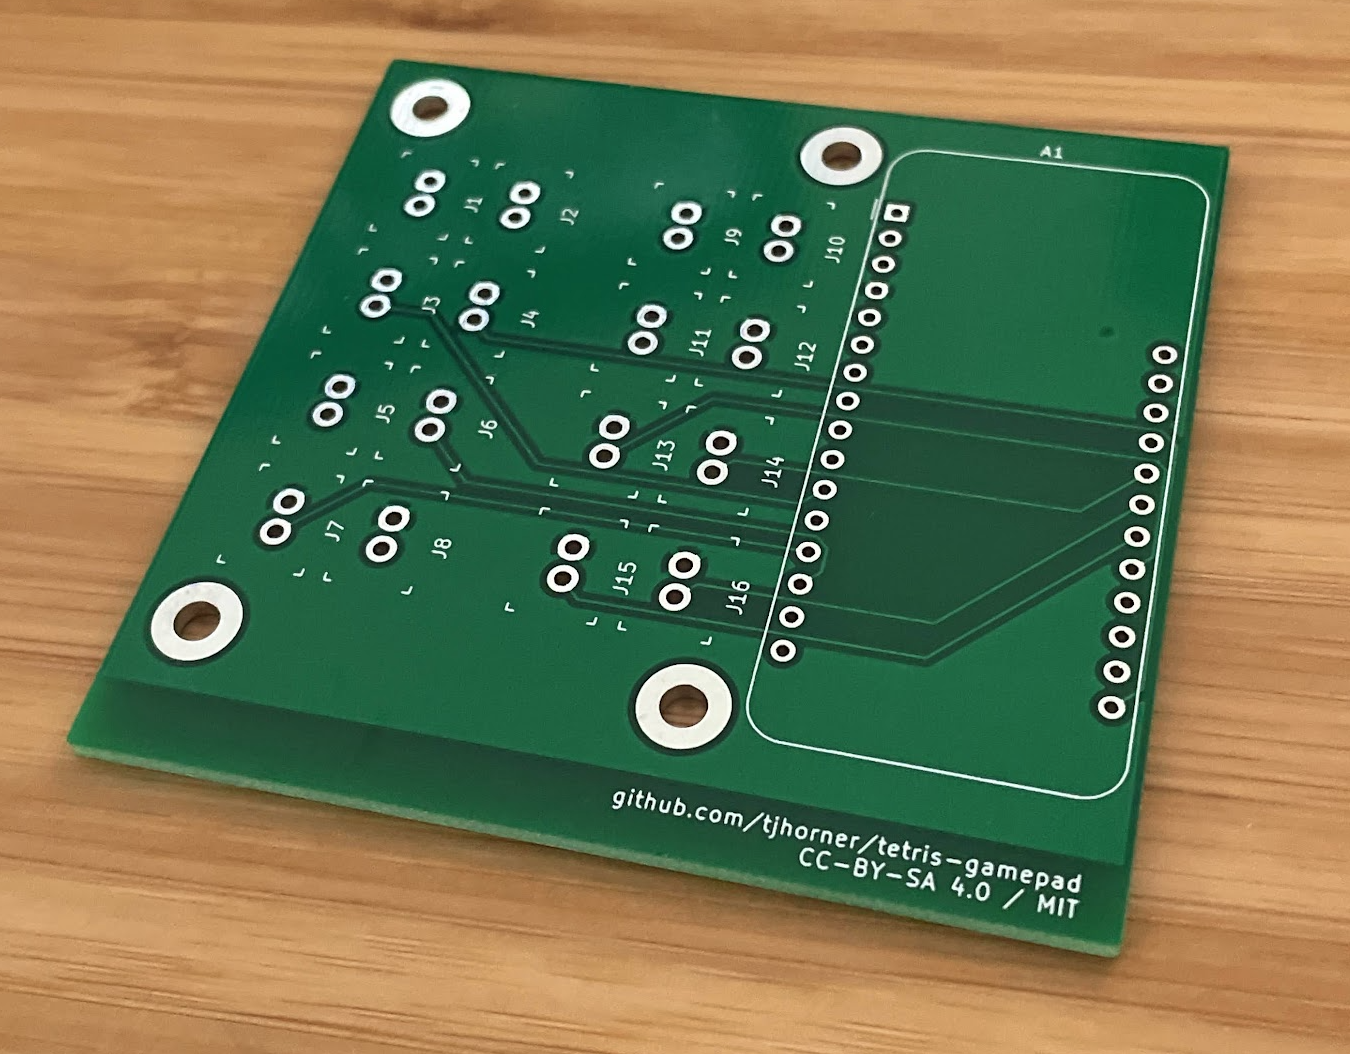
I ordered the design for fabrication from both JLCPCB and OSH Park to see which would come faster, and to compare quality. JLCPCB actually won, and I even submitted a revised design to them because I realized a mistake in the first order.
After about a week, they arrived, and I was so stoked to see they turned out wonderfully!
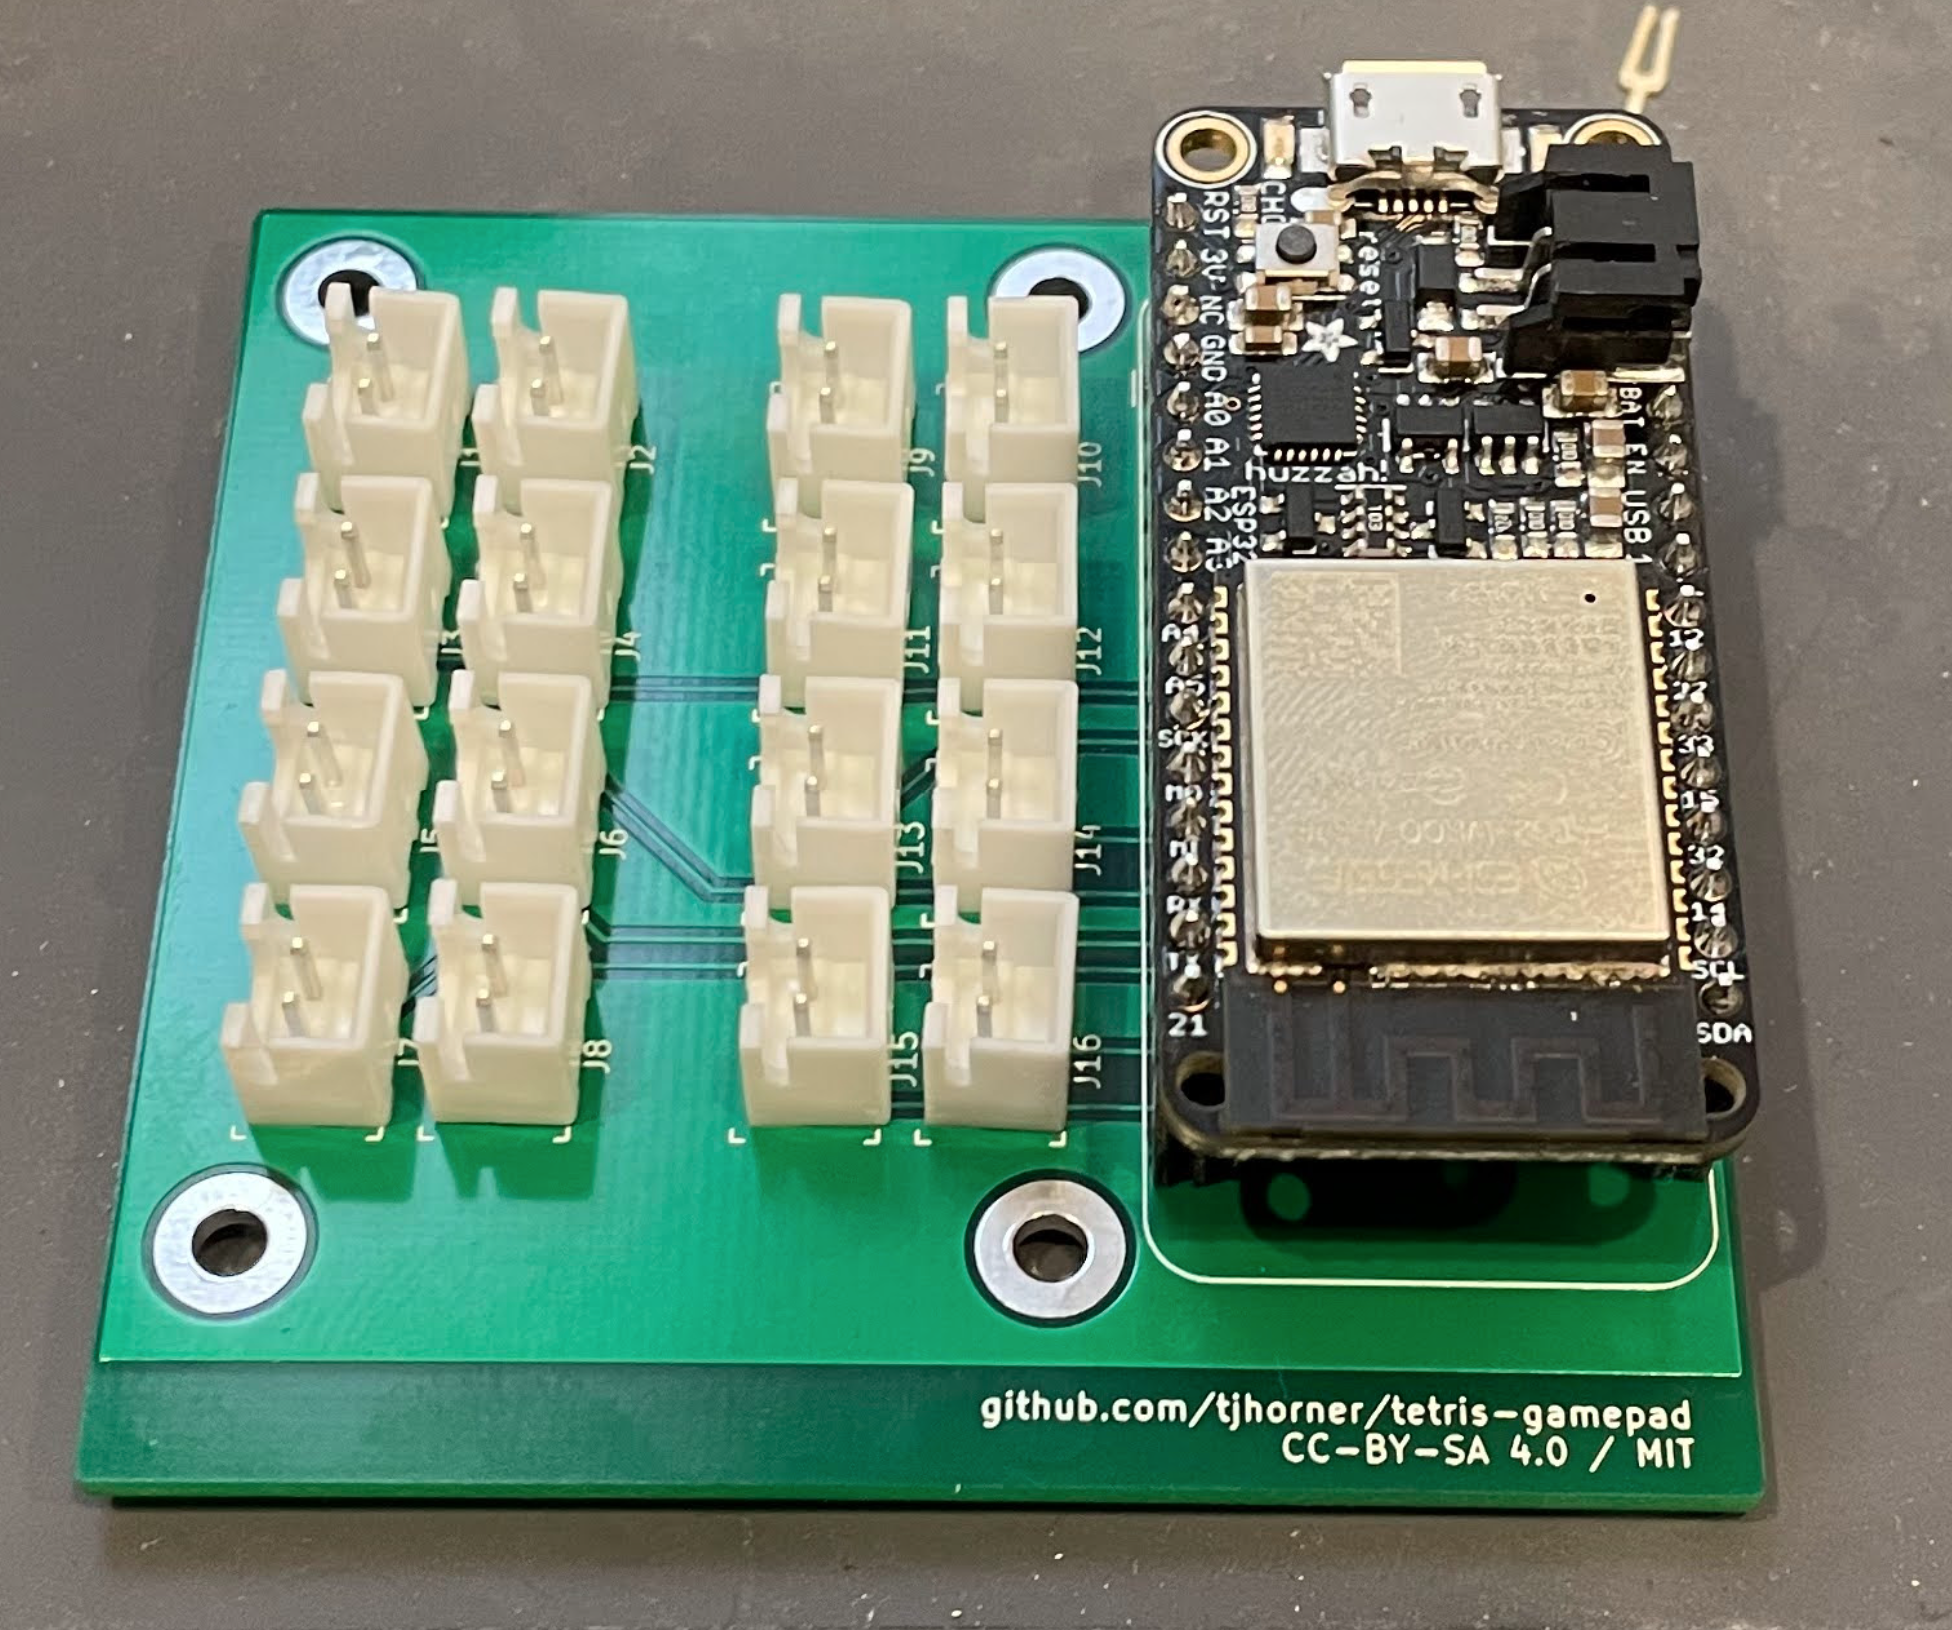
Here's what it looked like after assembly:
And after connecting all the buttons:
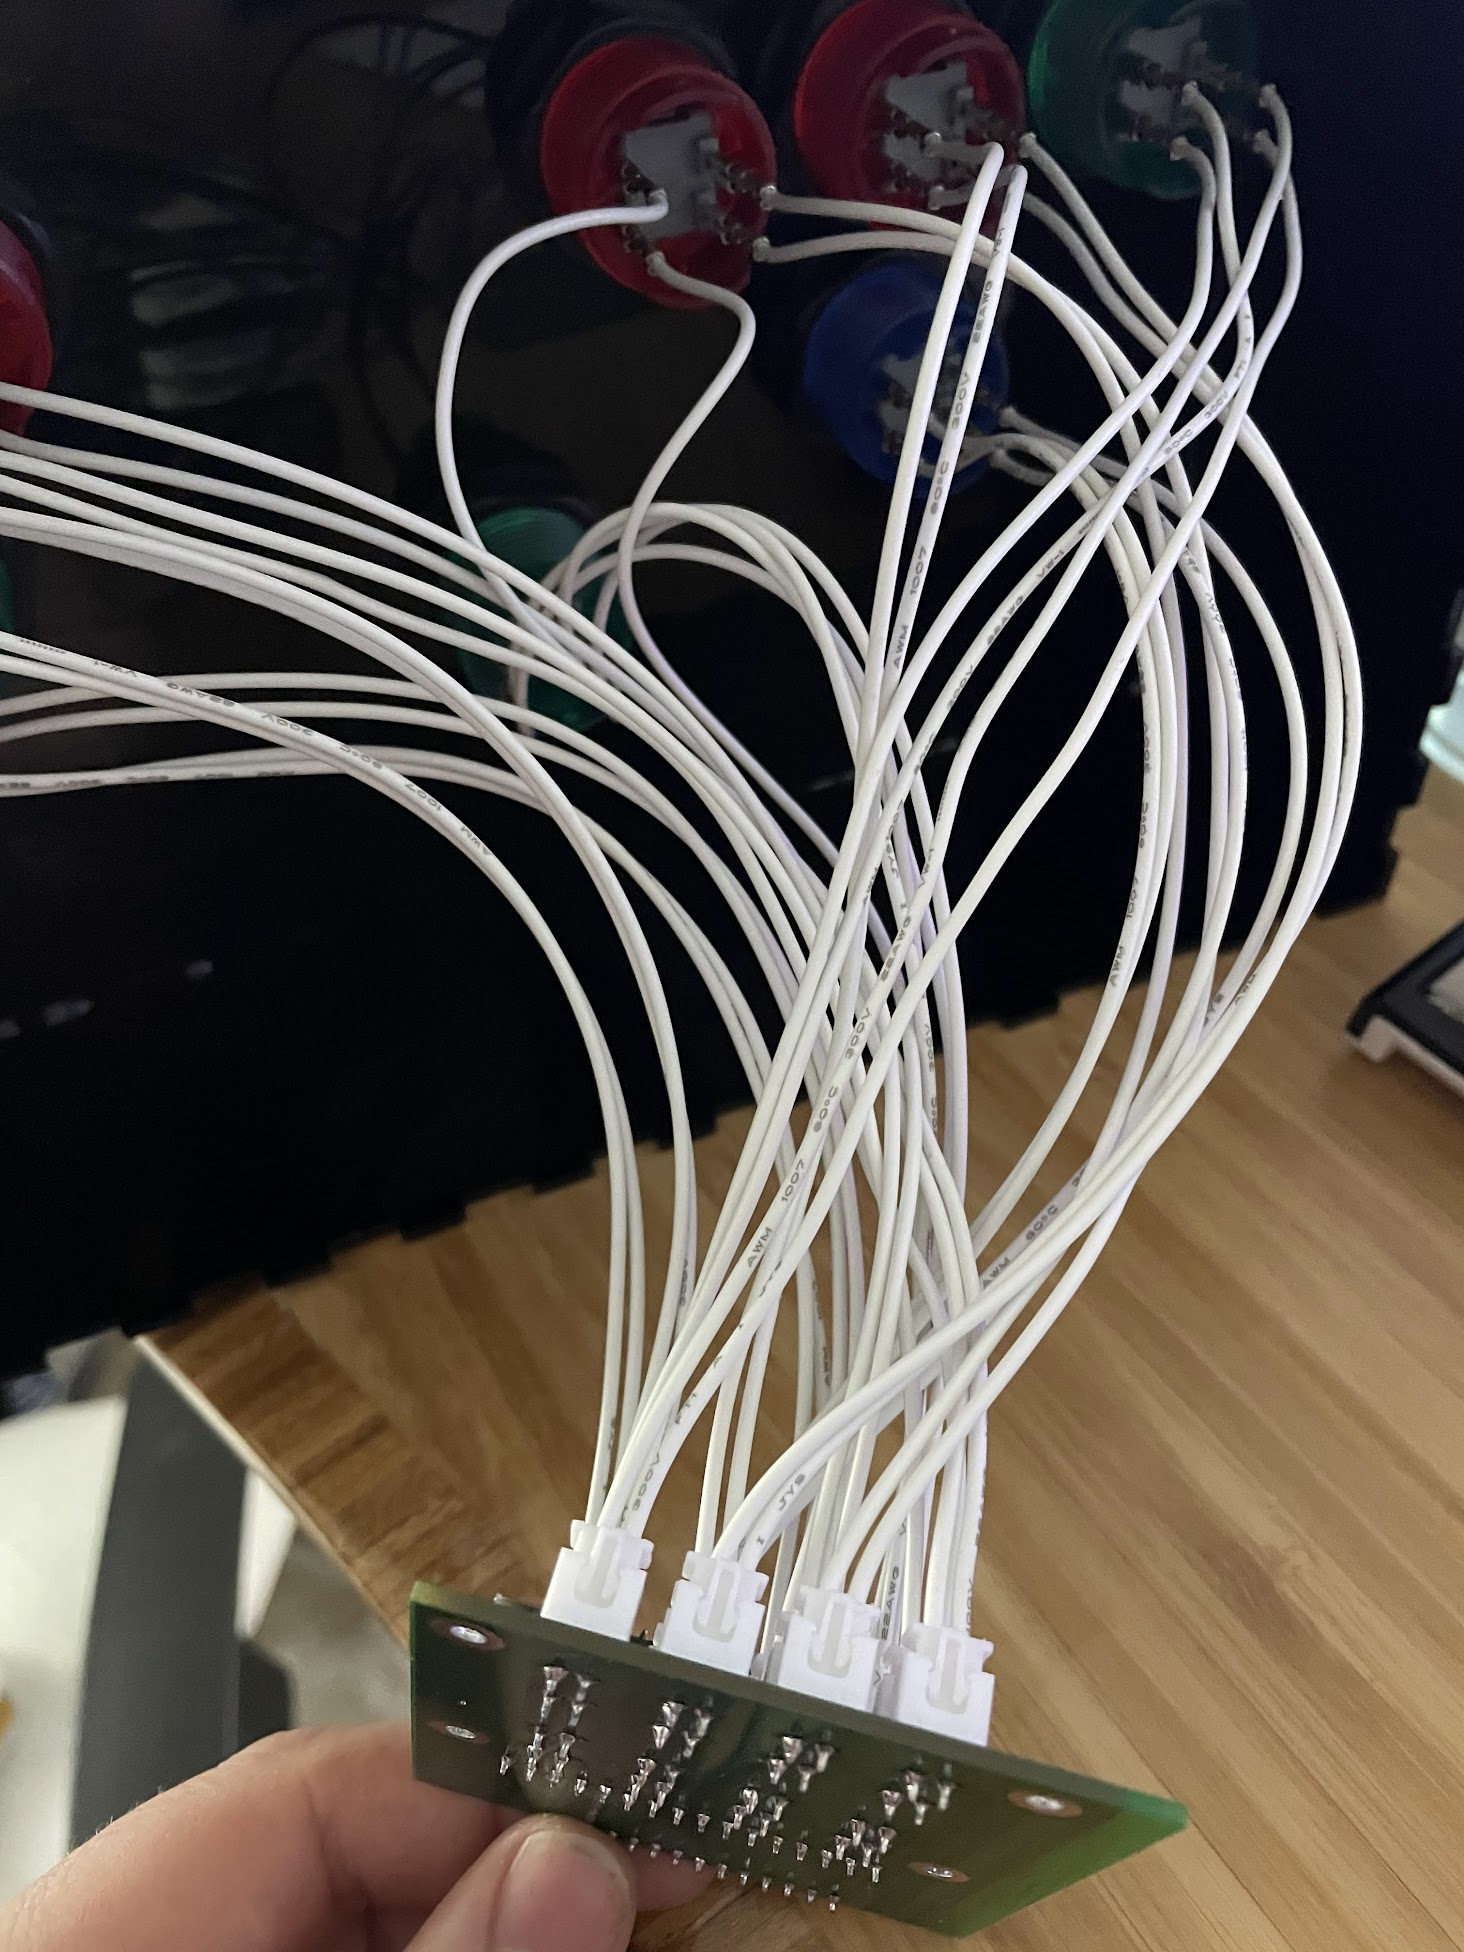
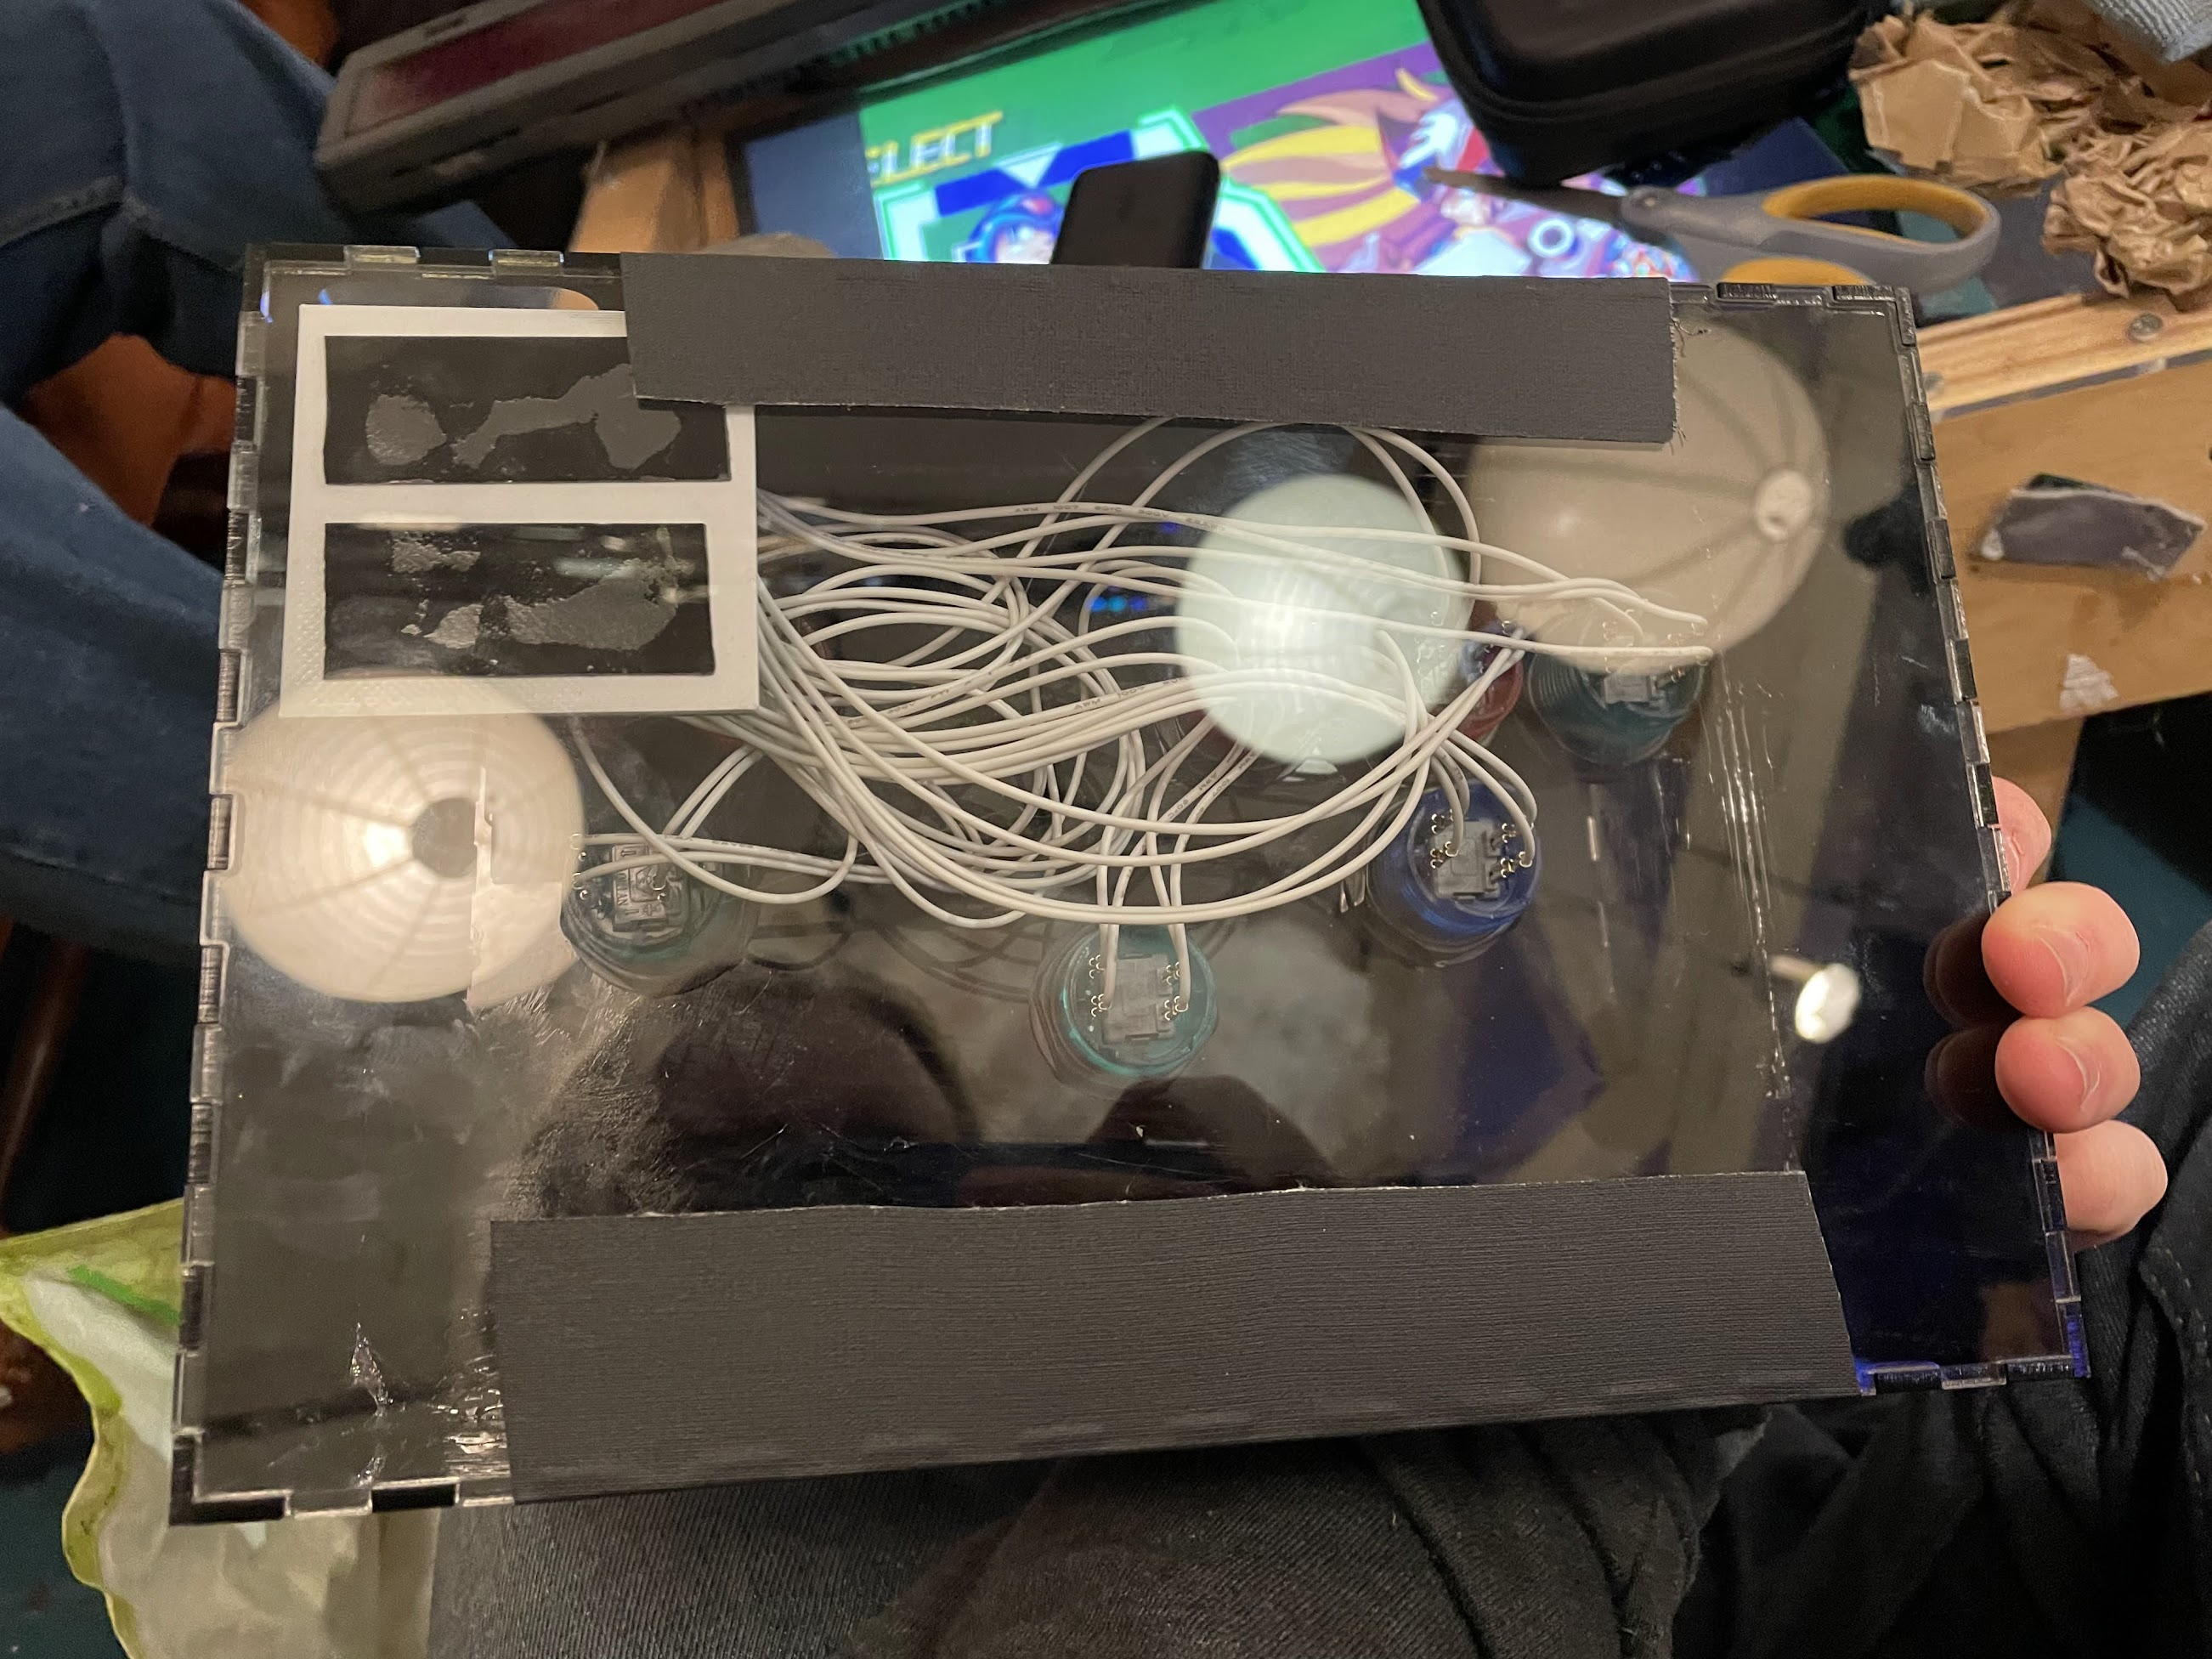
It worked amazingly the first time, which is a thing that never happens to me. I cleaned up the leads on the bottom to make it more flat, printed out a little mounting plate and went to NYC Resistor to cut the bottom side out. I sealed it with tape so I could easily take it apart if I need to.
Conclusion
And with that, I completed this project with my own software, hardware, and PCB design in just a month! I'm pretty proud of this thing, and it gave me invaluable skills to use in the future. In fact, I've already started making my old electronics projects as PCBs to clean them up. Stay tuned for that!
Here's a video of the gamepad in action playing Tetris Effect: Connected on my Switch:
I bet none of you can play as good as me. finally got the coveted one-tris (it's very hard to play while recording lol) pic.twitter.com/F1yvBdrb3Q
— ︀ (@tjhorner) March 10, 2022
The entire project is open source on GitHub, too, if you want to build your own or just check out the code:
 tjhorner
Thanks
Although I'm proud of the work I did, I absolutely couldn't have done it without these wonderful people:
- The kind folks at NYC Resistor for hosting their public craft nights, which opened up a bunch of resources and tools (namely, the laser cutter!) to me, helping make this project a reality
- The creator of MakerCase for making laser cut boxes easy
- The creator of both the ESP32 gamepad and ESP32 keyboard libraries
- The BlueCubeMod project, which is what the Pro Controller mode is largely based on